Interface Servo Motor With Raspberry Pi Pico using MicroPython |
Table of Contents
In this tutorial we are going to control an SG-90 Servo motor with raspberry pi pico board, Servo motors are used in a variety of applications such as RC cars, drones, and robot arms. They are also used in industrial applications such as CNC machines and 3D printers. Servo motors have three wires:
There are many beginners suffering from the basics of the Raspberry Pi Pico Board. So I decided to start a series of articles discussing the basics of Raspberry Pi Pico Projects. Check out our Raspberry Pi Pico Projects Tutorials.
In this tutorial, I’m going to run only one Servo Motor. because the Code is only for one Servo motor. if you want to control multiple Servos motors then you have to change the code. If you understand code you will be able to control multiple servos.
Required Components
- Raspberry Pi Pico
- Servo motor
- Jumper cable
What Is Servo Motor
A servo motor is a rotary actuator that uses feedback to control its angular position. It consists of a motor, a gear train, a control circuit, and a feedback mechanism. The gear train reduces the motor’s speed while increasing its torque. The control circuit monitors the position of the motor shaft and compares it to the desired position. The feedback mechanism adjusts the current to the motor, based on the difference between the two positions.
Schematic Diagram for Servo Motor With Raspberry Pi Pico

The schematic diagram is very easy To control Servo Motor With Raspberry Pi Pico please follow the circuit diagram.
Servo Motor —> Raspberry Pi Pico
- PWM Pin —> GP0 Pin
- VCC Pin —> 3.3V
- GND Pin —> GND Pin
The Servo motor consists of three wires; red, brown, and yellow. Two wires are for VCC and ground and the third one is the data or control pin.
Source Code
To program the Raspberry Pi Pico there is various development Software available (like uPyCraft IDE, Visual Studio Code, Thonny IDE, etc.) I used the Thonny IDE that supports Micropython on the Raspberry Pi Pico.
First setup Thonny IDE for Raspberry Pi Pico:- How to Set Up and Program Raspberry Pi Pico
- Open the Thonny IDE once it is successfully installed.
- Choose the “for all users” option.
- Connect the Raspberry Pi Pico board to your laptop.
- To create a new project; go to Files > New.
- Connect the Raspberry Pi Pico board to the laptop using a USB cable.
- Click on the ‘MicoPython(Raspberry Pi Pico)’ option f
- Select the interpreter for raspberry Pi Pico
Copy all the below codes and then save all of the codes on Raspberry Pi Pico Board.
- Click on the ‘save’ icon to save the program.
- After clicking on the ‘Save’, an option ‘Where to save to? can select any of the ‘Raspberry Pi Pico’ options.
- Run the program once it is successfully saved and compiled without any bugs.
myservo.py
|
1 2 3 4 5 6 7 8 9 10 11 12 13 14 15 16 17 18 19 20 21 22 23 24 25 26 27 28 29 30 31 32 33 |
from machine import Pin,PWM class Servo(object): def __init__(self, pin: int=15, hz: int=50): self._servo = PWM(Pin(pin)) self._servo.freq(hz) #duty = 1638 = 0.5ms = 65535/2/(T)(1/50)/2*1000 def ServoDuty(self, duty): if duty <= 1638: duty = 1638 if duty >= 8190: duty = 8190 self._servo.duty_u16(duty) def ServoAngle(self, pos): if pos <= 0: pos = 0 if pos >= 180: pos = 180 pos_buffer = (pos/180) * 6552 self._servo.duty_u16(int(pos_buffer) + 1638) def ServoTime(self, us): if us <= 500: us = 500 if us >= 2500: us = 2500 pos_buffer= (us / 1000) * 3276 self._servo.duty_u16(int(pos_buffer)) def deinit(self): self._servo.deinit() |
main.py
after uploading myservo.py myservo.py it’s time to upload the main code, upload below code and
|
1 2 3 4 5 6 7 8 9 10 11 12 13 14 15 16 17 |
from myservo import Servo import time servo=Servo(15) servo.ServoAngle(0) time.sleep_ms(1000) try: while True: for i in range(0, 180, 1): servo.ServoAngle(i) time.sleep_ms(15) for i in range(180, 0, -1): servo.ServoAngle(i) time.sleep_ms(15) except: servo.deinit() |
Conclusion
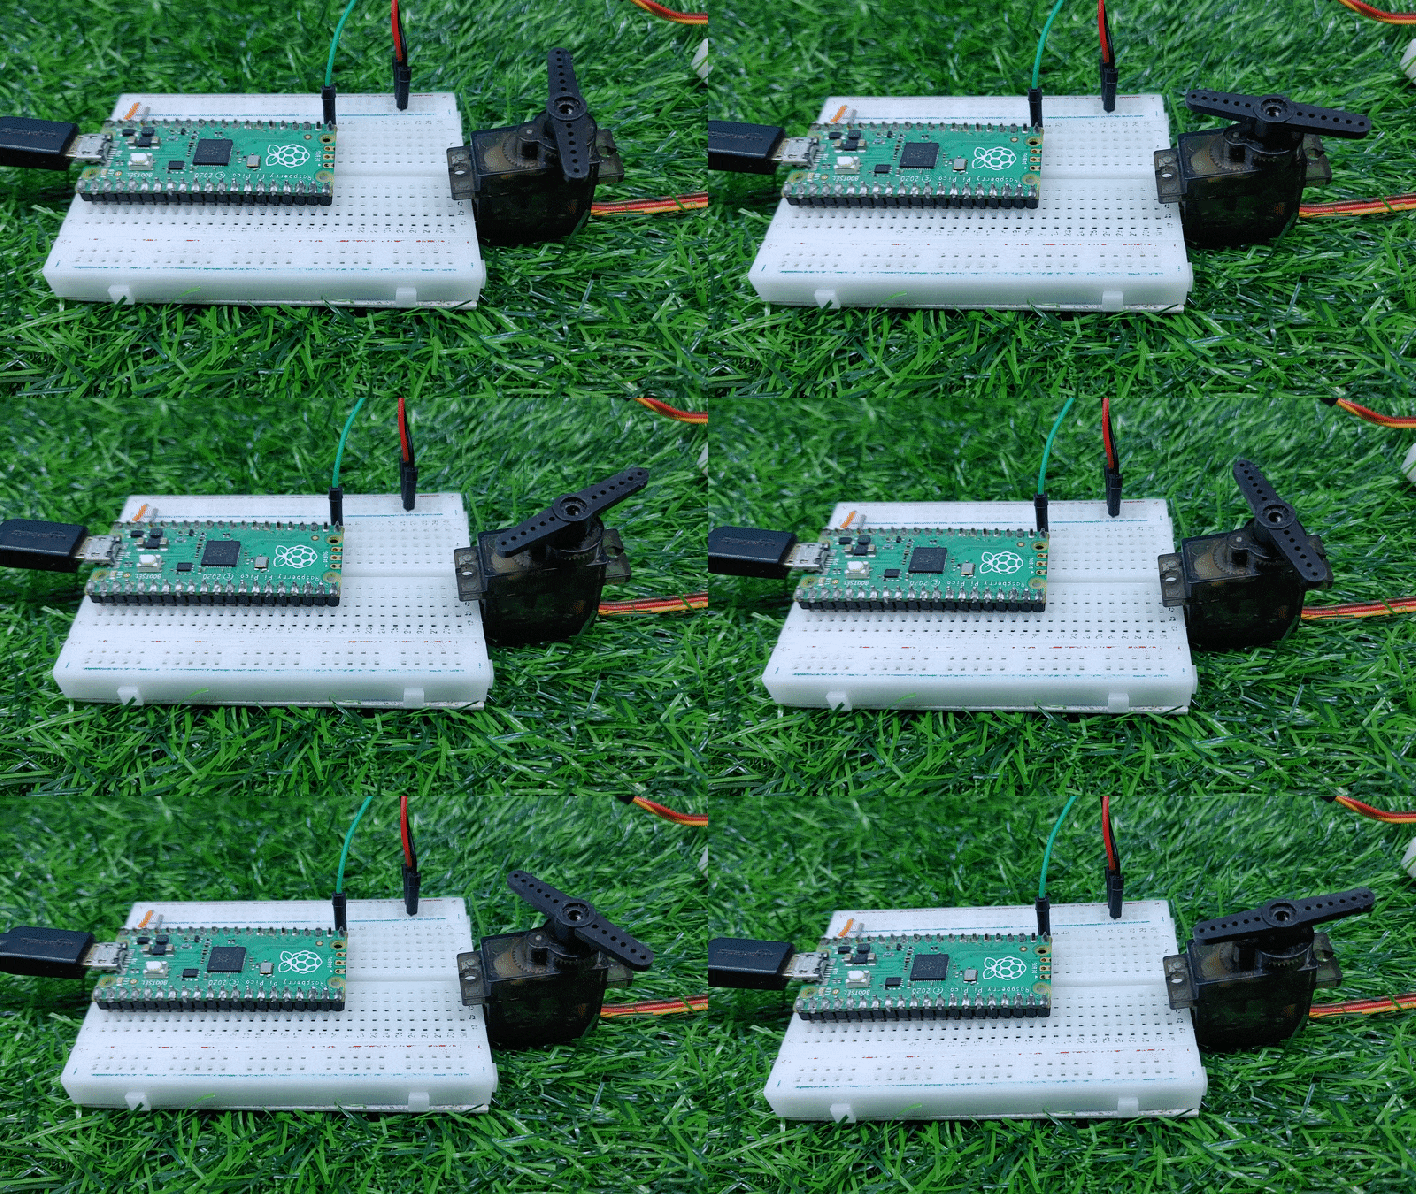
When you run the code on the Raspberry Pi pico board, you will see that the servo is rotating from 0 to 180 degrees and 180 to 0 degrees continuously.
Read Similar Articles:
- Getting Started Raspberry Pi Pico – Pinout, Specs – Beginner Guide
- Interfacing PIR Motion Sensor with Raspberry Pi Pico
- Raspberry Pi Pico Home Automation System
- Interface Servo Motor With Raspberry Pi Pico
- Interface 0.96″ OLED Display with Raspberry Pi Pico
- Raspberry Pi Pico Weather Station Using Dht11 Sensor
- Interface 16*2 LCD Display With Raspberry Pi Pico


4 Comments