How To Connect MPU6050 With Raspberry Pi Pico Tutorial
Table of Contents
MPU6050 is one of the most popular sensors used in IoT applications. It is an accelerometer and gyroscope sensor that can measure an object’s acceleration and rotation. In this project, we will be using the MPU6050 With Raspberry Pi Pico to get readings from the gyroscope and accelerometer. The sensor can be connected to a Raspberry Pi Pico through the I2C interface.
Required Components
Raspberry Pi Pico
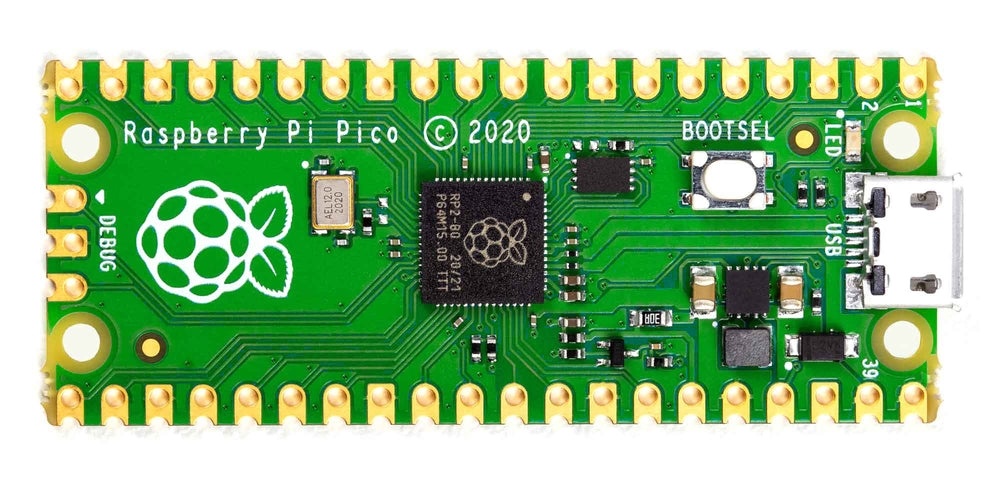
The Raspberry Pi Pico is a microcontroller board based on the RP2040 chip, developed by Raspberry Pi. It was first released on January 2021. The Raspberry Pi Pico board has two main components: the RP2040 chip and a USB controller.
The RP2040 chip is a Cortex M0+-based microcontroller, designed by Raspberry Pi. It has two ARM Cortex M0+ cores, each running at up to 133 MHz. The chip also has 264kB of SRAM, and 2MB of on-chip flash memory. The USB controller is used to connect the Pico to a computer or other USB devices
Raspberry Pi Pico Pinout
The Pico’s 40-pin header is arranged in two rows of 20 pins. The pins in each row are numbered 1-20, starting at the top left of the header.

What is MPU6050?


The MPU6050 is a 6-axis MEMS (Microelectromechanical systems) device that combines a 3-axis gyroscope and a 3-axis accelerometer on a single chip. It also houses an on-chip Digital Motion Processor (DMP) which processes complex 6-axis MotionFusion algorithms.
The device can be used in various applications such as drones, robotics, gaming devices, pedometers, and Wearable devices. The MPU6050 is available in a small 4x4mm QFN package. In this essay, I’ll explain how the MPU6050 works and how you can use it in your projects.
The MPU6050 can be used to measure both acceleration and rotational rate, making it ideal for applications such as monitoring the orientation of a robotic arm or measuring the vibrations of an engine.
MPU6050 Pinout

- VCC pin is used to power the sensor
- GND pin is connected to the ground
- SCL (serial clock) pin is a clock pulse pin used for I2C communication
- SDA (serial data) pin transfers data to/from the microcontroller according to the I2C protocol
- XDA (Auxiliary Serial Data) pin allows connecting external I2C modules with MPU6050
- XCL (Auxiliary clock) pin enables the auxiliary device from MPU6050
- AD0 (Address select) pin is an I2C slave address select pin. This pin allows selecting one or more MPU6050 when connected with a single I2S serial bus
- INT (interrupt) pin is a digital output pin which gives an indication to a microcontroller when data are available to be read. Learn How to Interface MPU6050 Accelerometer and Gyroscope Sensor with Arduino
MPU6050 Features
- MEMS 3-axis accelerometer and 3-axis gyroscope values combined
- Power Supply: 3-5V
- Communication: I2C protocol
- Built-in 16-bit ADC provides high accuracy
- Built-in DMP provides high computational power
- Can be used to interface with other IIC devices like magnetometer
- Configurable IIC Address
- In-built Temperature sensor
How to connect MPU6050 with Raspberry Pi Pico
To use the MPU6050, you’ll need to connect it to your Raspberry pi pico. The MPU6050 uses an I2C interface, so you’ll need to use a microcontroller with an I2C interface. I2C is a two-wire interface that allows you to connect multiple devices to a single microcontroller
To join the MPU6050 sensor to the Raspberry Pi Pico, we will use the I2C interface. The I2C interface is a two-wire interface that uses the SDA and SCL pins
MPU6050<======> Raspberry Pi Pico
- VCC <======> 5v out pin
- GND <======>Ground pin
- SDA <======>1 pin //serial data
- SCL<======> 2pin // serial clock
Schematic Diagram -MPU6050 with Raspberry Pi Pico

Once you’ve connected the MPU6050 to your microcontroller, you can use the I2C interface to read the accelerometer and gyroscope data.
The MPU6050 provides 16-bit data for each axis, so you can use the accelerometer data to calculate acceleration, and the gyroscope data to calculate the rotational rate.
Python Program
To do this Interfacing of the MPU6050 Module project with Raspberry Pi Pico Board we need to:
- Download and install the latest version of Python3 on your PC
- Download and install the latest version of either upycraft IDE or Thonny IDE.
- Setting up a MicroPython within Raspberry Pi Pico.
Guide below tutorials to follow the above steps to complete our Pico board ready for programming.
- Getting Started With Raspberry Pi Pico With Thonny IDE
- Getting Started Raspberry Pi Pico – Pinout, Specs – Beginner Guide
Setup Thonny IDE
 Thonny is a Python IDE that is designed for beginners. It is very user-friendly and has a lot of features that make it perfect for beginner programmers. The Pico is a great fit for Thonny because it is very easy to use and has a lot of GPIO pins that can be used for various purposes.Getting Started With Raspberry Pi Pico With Thonny IDE
First, you need to download and install the Thonny IDE. You can get it here: https://thonny.org/
- Next, open Thonny and go to File > Preferences. In the Preferences window, go to the Interpreters tab.
- Click the “Add” button and select “Raspberry Pi Pico” from the drop-down menu.
- Now, you need to connect your Raspberry Pi Pico to your computer via USB.
- Enter the following into the “Script to run on connected device” text box:
- Once it is connected, click the “Upload” button in the Thonny IDE.
MicroPython Script for MPU6050
To read the values of the Accelerometer, Gyroscope, and Temperature from MPU6050 we need two libraries: imu.py and vector3d.py. and to program the Raspberry Pi Pico board using MicroPython we will use Pico-Thonny IDE. we have to upload these libraries one by one.
vector3d.py
|
1 2 3 4 5 6 7 8 9 10 11 12 13 14 15 16 17 18 19 20 21 22 23 24 25 26 27 28 29 30 31 32 33 34 35 36 37 38 39 40 41 42 43 44 45 46 47 48 49 50 51 52 53 54 55 56 57 58 59 60 61 62 63 64 65 66 67 68 69 70 71 72 73 74 75 76 77 78 79 80 81 82 83 84 85 86 87 88 89 90 91 92 93 94 95 96 97 98 99 100 101 102 103 104 105 106 107 108 109 110 111 112 113 114 115 116 117 118 119 120 121 122 123 124 125 |
# vector3d.py 3D vector class for use in inertial measurement unit drivers # Author Peter Hinch, Sebastian Plamauer from utime import sleep_ms from math import sqrt, degrees, acos, atan2 def default_wait(): ''' delay of 50 ms ''' sleep_ms(50) class Vector3d(object): ''' Represents a vector in a 3D space using Cartesian coordinates. Internally uses sensor relative coordinates. Returns vehicle-relative x, y and z values. ''' def __init__(self, transposition, scaling, update_function): self._vector = [0, 0, 0] self._ivector = [0, 0, 0] self.cal = (0, 0, 0) self.argcheck(transposition, "Transposition") self.argcheck(scaling, "Scaling") if set(transposition) != {0, 1, 2}: raise ValueError('Transpose indices must be unique and in range 0-2') self._scale = scaling self._transpose = transposition self.update = update_function def argcheck(self, arg, name): ''' checks if arguments are of correct length ''' if len(arg) != 3 or not (type(arg) is list or type(arg) is tuple): raise ValueError(name + ' must be a 3 element list or tuple') def calibrate(self, stopfunc, waitfunc=default_wait): ''' calibration routine, sets cal ''' self.update() maxvec = self._vector[:] # Initialise max and min lists with current values minvec = self._vector[:] while not stopfunc(): waitfunc() self.update() maxvec = list(map(max, maxvec, self._vector)) minvec = list(map(min, minvec, self._vector)) self.cal = tuple(map(lambda a, b: (a + b)/2, maxvec, minvec)) @property def _calvector(self): ''' Vector adjusted for calibration offsets ''' return list(map(lambda val, offset: val - offset, self._vector, self.cal)) @property def x(self): # Corrected, vehicle relative floating point values self.update() return self._calvector[self._transpose[0]] * self._scale[0] @property def y(self): self.update() return self._calvector[self._transpose[1]] * self._scale[1] @property def z(self): self.update() return self._calvector[self._transpose[2]] * self._scale[2] @property def xyz(self): self.update() return (self._calvector[self._transpose[0]] * self._scale[0], self._calvector[self._transpose[1]] * self._scale[1], self._calvector[self._transpose[2]] * self._scale[2]) @property def magnitude(self): x, y, z = self.xyz # All measurements must correspond to the same instant return sqrt(x**2 + y**2 + z**2) @property def inclination(self): x, y, z = self.xyz return degrees(acos(z / sqrt(x**2 + y**2 + z**2))) @property def elevation(self): return 90 - self.inclination @property def azimuth(self): x, y, z = self.xyz return degrees(atan2(y, x)) # Raw uncorrected integer values from sensor @property def ix(self): return self._ivector[0] @property def iy(self): return self._ivector[1] @property def iz(self): return self._ivector[2] @property def ixyz(self): return self._ivector @property def transpose(self): return tuple(self._transpose) @property def scale(self): return tuple(self._scale) |
imu.py
|
1 2 3 4 5 6 7 8 9 10 11 12 13 14 15 16 17 18 19 20 21 22 23 24 25 26 27 28 29 30 31 32 33 34 35 36 37 38 39 40 41 42 43 44 45 46 47 48 49 50 51 52 53 54 55 56 57 58 59 60 61 62 63 64 65 66 67 68 69 70 71 72 73 74 75 76 77 78 79 80 81 82 83 84 85 86 87 88 89 90 91 92 93 94 95 96 97 98 99 100 101 102 103 104 105 106 107 108 109 110 111 112 113 114 115 116 117 118 119 120 121 122 123 124 125 126 127 128 129 130 131 132 133 134 135 136 137 138 139 140 141 142 143 144 145 146 147 148 149 150 151 152 153 154 155 156 157 158 159 160 161 162 163 164 165 166 167 168 169 170 171 172 173 174 175 176 177 178 179 180 181 182 183 184 185 186 187 188 189 190 191 192 193 194 195 196 197 198 199 200 201 202 203 204 205 206 207 208 209 210 211 212 213 214 215 216 217 218 219 220 221 222 223 224 225 226 227 228 229 230 231 232 233 234 235 236 237 238 239 240 241 242 243 244 245 246 247 248 249 250 251 252 253 254 255 256 257 258 259 260 261 262 263 264 265 266 267 268 269 270 271 272 273 274 275 276 277 278 279 280 281 282 283 284 285 286 287 288 289 290 291 292 293 294 295 296 297 298 299 300 301 302 303 304 305 306 307 308 309 310 311 312 313 314 315 316 317 318 319 320 321 322 323 324 325 326 327 328 329 330 331 332 333 334 335 336 337 338 339 340 341 342 343 344 345 346 347 348 349 350 351 352 353 354 355 356 357 358 359 360 361 362 363 364 |
# imu.py MicroPython driver for the InvenSense inertial measurement units # This is the base class # Peter Hinch, Sebastian Plamauer from utime import sleep_ms from machine import I2C from vector3d import Vector3d class MPUException(OSError): ''' Exception for MPU devices ''' pass def bytes_toint(msb, lsb): ''' Convert two bytes to signed integer (big endian) for little endian reverse msb, lsb arguments Can be used in an interrupt handler ''' if not msb & 0x80: return msb << 8 | lsb # +ve return - (((msb ^ 255) << 8) | (lsb ^ 255) + 1) class MPU6050(object): ''' Module for InvenSense IMUs. Base class implements MPU6050 6DOF sensor, with features common to MPU9150 and MPU9250 9DOF sensors. ''' _I2Cerror = "I2C failure when communicating with IMU" _mpu_addr = (104, 105) # addresses of MPU9150/MPU6050. There can be two devices _chip_id = 104 def __init__(self, side_str, device_addr=None, transposition=(0, 1, 2), scaling=(1, 1, 1)): self._accel = Vector3d(transposition, scaling, self._accel_callback) self._gyro = Vector3d(transposition, scaling, self._gyro_callback) self.buf1 = bytearray(1) # Pre-allocated buffers for reads: allows reads to self.buf2 = bytearray(2) # be done in interrupt handlers self.buf3 = bytearray(3) self.buf6 = bytearray(6) sleep_ms(200) # Ensure PSU and device have settled if isinstance(side_str, str): # Non-pyb targets may use other than X or Y self._mpu_i2c = I2C(side_str) elif hasattr(side_str, 'readfrom'): # Soft or hard I2C instance. See issue #3097 self._mpu_i2c = side_str else: raise ValueError("Invalid I2C instance") if device_addr is None: devices = set(self._mpu_i2c.scan()) mpus = devices.intersection(set(self._mpu_addr)) number_of_mpus = len(mpus) if number_of_mpus == 0: raise MPUException("No MPU's detected") elif number_of_mpus == 1: self.mpu_addr = mpus.pop() else: raise ValueError("Two MPU's detected: must specify a device address") else: if device_addr not in (0, 1): raise ValueError('Device address must be 0 or 1') self.mpu_addr = self._mpu_addr[device_addr] self.chip_id # Test communication by reading chip_id: throws exception on error # Can communicate with chip. Set it up. self.wake() # wake it up self.passthrough = True # Enable mag access from main I2C bus self.accel_range = 3 # default to highest sensitivity self.gyro_range = 3 # Likewise for gyro # read from device def _read(self, buf, memaddr, addr): # addr = I2C device address, memaddr = memory location within the I2C device ''' Read bytes to pre-allocated buffer Caller traps OSError. ''' self._mpu_i2c.readfrom_mem_into(addr, memaddr, buf) # write to device def _write(self, data, memaddr, addr): ''' Perform a memory write. Caller should trap OSError. ''' self.buf1[0] = data self._mpu_i2c.writeto_mem(addr, memaddr, self.buf1) # wake def wake(self): ''' Wakes the device. ''' try: self._write(0x01, 0x6B, self.mpu_addr) # Use best clock source except OSError: raise MPUException(self._I2Cerror) return 'awake' # mode def sleep(self): ''' Sets the device to sleep mode. ''' try: self._write(0x40, 0x6B, self.mpu_addr) except OSError: raise MPUException(self._I2Cerror) return 'asleep' # chip_id @property def chip_id(self): ''' Returns Chip ID ''' try: self._read(self.buf1, 0x75, self.mpu_addr) except OSError: raise MPUException(self._I2Cerror) chip_id = int(self.buf1[0]) if chip_id != self._chip_id: raise ValueError('Bad chip ID retrieved: MPU communication failure') return chip_id @property def sensors(self): ''' returns sensor objects accel, gyro ''' return self._accel, self._gyro # get temperature @property def temperature(self): ''' Returns the temperature in degree C. ''' try: self._read(self.buf2, 0x41, self.mpu_addr) except OSError: raise MPUException(self._I2Cerror) return bytes_toint(self.buf2[0], self.buf2[1])/340 + 35 # I think # passthrough @property def passthrough(self): ''' Returns passthrough mode True or False ''' try: self._read(self.buf1, 0x37, self.mpu_addr) return self.buf1[0] & 0x02 > 0 except OSError: raise MPUException(self._I2Cerror) @passthrough.setter def passthrough(self, mode): ''' Sets passthrough mode True or False ''' if type(mode) is bool: val = 2 if mode else 0 try: self._write(val, 0x37, self.mpu_addr) # I think this is right. self._write(0x00, 0x6A, self.mpu_addr) except OSError: raise MPUException(self._I2Cerror) else: raise ValueError('pass either True or False') # sample rate. Not sure why you'd ever want to reduce this from the default. @property def sample_rate(self): ''' Get sample rate as per Register Map document section 4.4 SAMPLE_RATE= Internal_Sample_Rate / (1 + rate) default rate is zero i.e. sample at internal rate. ''' try: self._read(self.buf1, 0x19, self.mpu_addr) return self.buf1[0] except OSError: raise MPUException(self._I2Cerror) @sample_rate.setter def sample_rate(self, rate): ''' Set sample rate as per Register Map document section 4.4 ''' if rate < 0 or rate > 255: raise ValueError("Rate must be in range 0-255") try: self._write(rate, 0x19, self.mpu_addr) except OSError: raise MPUException(self._I2Cerror) # Low pass filters. Using the filter_range property of the MPU9250 is # harmless but gyro_filter_range is preferred and offers an extra setting. @property def filter_range(self): ''' Returns the gyro and temperature sensor low pass filter cutoff frequency Pass: 0 1 2 3 4 5 6 Cutoff (Hz): 250 184 92 41 20 10 5 Sample rate (KHz): 8 1 1 1 1 1 1 ''' try: self._read(self.buf1, 0x1A, self.mpu_addr) res = self.buf1[0] & 7 except OSError: raise MPUException(self._I2Cerror) return res @filter_range.setter def filter_range(self, filt): ''' Sets the gyro and temperature sensor low pass filter cutoff frequency Pass: 0 1 2 3 4 5 6 Cutoff (Hz): 250 184 92 41 20 10 5 Sample rate (KHz): 8 1 1 1 1 1 1 ''' # set range if filt in range(7): try: self._write(filt, 0x1A, self.mpu_addr) except OSError: raise MPUException(self._I2Cerror) else: raise ValueError('Filter coefficient must be between 0 and 6') # accelerometer range @property def accel_range(self): ''' Accelerometer range Value: 0 1 2 3 for range +/-: 2 4 8 16 g ''' try: self._read(self.buf1, 0x1C, self.mpu_addr) ari = self.buf1[0]//8 except OSError: raise MPUException(self._I2Cerror) return ari @accel_range.setter def accel_range(self, accel_range): ''' Set accelerometer range Pass: 0 1 2 3 for range +/-: 2 4 8 16 g ''' ar_bytes = (0x00, 0x08, 0x10, 0x18) if accel_range in range(len(ar_bytes)): try: self._write(ar_bytes[accel_range], 0x1C, self.mpu_addr) except OSError: raise MPUException(self._I2Cerror) else: raise ValueError('accel_range can only be 0, 1, 2 or 3') # gyroscope range @property def gyro_range(self): ''' Gyroscope range Value: 0 1 2 3 for range +/-: 250 500 1000 2000 degrees/second ''' # set range try: self._read(self.buf1, 0x1B, self.mpu_addr) gri = self.buf1[0]//8 except OSError: raise MPUException(self._I2Cerror) return gri @gyro_range.setter def gyro_range(self, gyro_range): ''' Set gyroscope range Pass: 0 1 2 3 for range +/-: 250 500 1000 2000 degrees/second ''' gr_bytes = (0x00, 0x08, 0x10, 0x18) if gyro_range in range(len(gr_bytes)): try: self._write(gr_bytes[gyro_range], 0x1B, self.mpu_addr) # Sets fchoice = b11 which enables filter except OSError: raise MPUException(self._I2Cerror) else: raise ValueError('gyro_range can only be 0, 1, 2 or 3') # Accelerometer @property def accel(self): ''' Acceleremoter object ''' return self._accel def _accel_callback(self): ''' Update accelerometer Vector3d object ''' try: self._read(self.buf6, 0x3B, self.mpu_addr) except OSError: raise MPUException(self._I2Cerror) self._accel._ivector[0] = bytes_toint(self.buf6[0], self.buf6[1]) self._accel._ivector[1] = bytes_toint(self.buf6[2], self.buf6[3]) self._accel._ivector[2] = bytes_toint(self.buf6[4], self.buf6[5]) scale = (16384, 8192, 4096, 2048) self._accel._vector[0] = self._accel._ivector[0]/scale[self.accel_range] self._accel._vector[1] = self._accel._ivector[1]/scale[self.accel_range] self._accel._vector[2] = self._accel._ivector[2]/scale[self.accel_range] def get_accel_irq(self): ''' For use in interrupt handlers. Sets self._accel._ivector[] to signed unscaled integer accelerometer values ''' self._read(self.buf6, 0x3B, self.mpu_addr) self._accel._ivector[0] = bytes_toint(self.buf6[0], self.buf6[1]) self._accel._ivector[1] = bytes_toint(self.buf6[2], self.buf6[3]) self._accel._ivector[2] = bytes_toint(self.buf6[4], self.buf6[5]) # Gyro @property def gyro(self): ''' Gyroscope object ''' return self._gyro def _gyro_callback(self): ''' Update gyroscope Vector3d object ''' try: self._read(self.buf6, 0x43, self.mpu_addr) except OSError: raise MPUException(self._I2Cerror) self._gyro._ivector[0] = bytes_toint(self.buf6[0], self.buf6[1]) self._gyro._ivector[1] = bytes_toint(self.buf6[2], self.buf6[3]) self._gyro._ivector[2] = bytes_toint(self.buf6[4], self.buf6[5]) scale = (131, 65.5, 32.8, 16.4) self._gyro._vector[0] = self._gyro._ivector[0]/scale[self.gyro_range] self._gyro._vector[1] = self._gyro._ivector[1]/scale[self.gyro_range] self._gyro._vector[2] = self._gyro._ivector[2]/scale[self.gyro_range] def get_gyro_irq(self): ''' For use in interrupt handlers. Sets self._gyro._ivector[] to signed unscaled integer gyro values. Error trapping disallowed. ''' self._read(self.buf6, 0x43, self.mpu_addr) self._gyro._ivector[0] = bytes_toint(self.buf6[0], self.buf6[1]) self._gyro._ivector[1] = bytes_toint(self.buf6[2], self.buf6[3]) self._gyro._ivector[2] = bytes_toint(self.buf6[4], self.buf6[5]) |
main.py
|
1 2 3 4 5 6 7 8 9 10 11 12 13 14 15 16 17 |
from imu import MPU6050 from time import sleep from machine import Pin, I2C i2c = I2C(0, sda=Pin(0), scl=Pin(1), freq=400000) imu = MPU6050(i2c) while True: ax=round(imu.accel.x,2) ay=round(imu.accel.y,2) az=round(imu.accel.z,2) gx=round(imu.gyro.x) gy=round(imu.gyro.y) gz=round(imu.gyro.z) tem=round(imu.temperature,2) print("ax",ax,"\t","ay",ay,"\t","az",az,"\t","gx",gx,"\t","gy",gy,"\t","gz",gz,"\t","Temperature",tem," ",end="\r") sleep(0) |
Conclusion
After uploading the All MicroPython script on the Raspberry Pi Pico board the MPU6050 sensor will start Printing the values being read for Accelerometer, Gyroscope, and Temperature. in the thorny IDE Shell window.

>> %Run -c $EDITOR_CONTENT
ax -0.03 ay -0.0 az 1.24 gx 0 gy -3 gz 1 Temperature 29.02
Read Similar Articles:
- Getting Started Raspberry Pi Pico – Pinout, Specs – Beginner Guide
- Interfacing PIR Motion Sensor with Raspberry Pi Pico
- Raspberry Pi Pico Home Automation System
- Interface Servo Motor With Raspberry Pi Pico
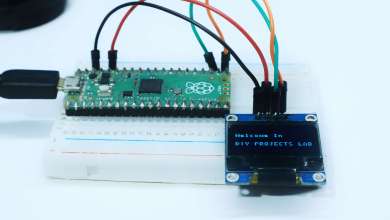
- Interface 0.96″ OLED Display with Raspberry Pi Pico
- Raspberry Pi Pico Weather Station Using Dht11 Sensor
- Interface 16*2 LCD Display With Raspberry Pi Pico