7-Segment LED Display With Raspberry PI Pico Using Micropython
Table of Contents
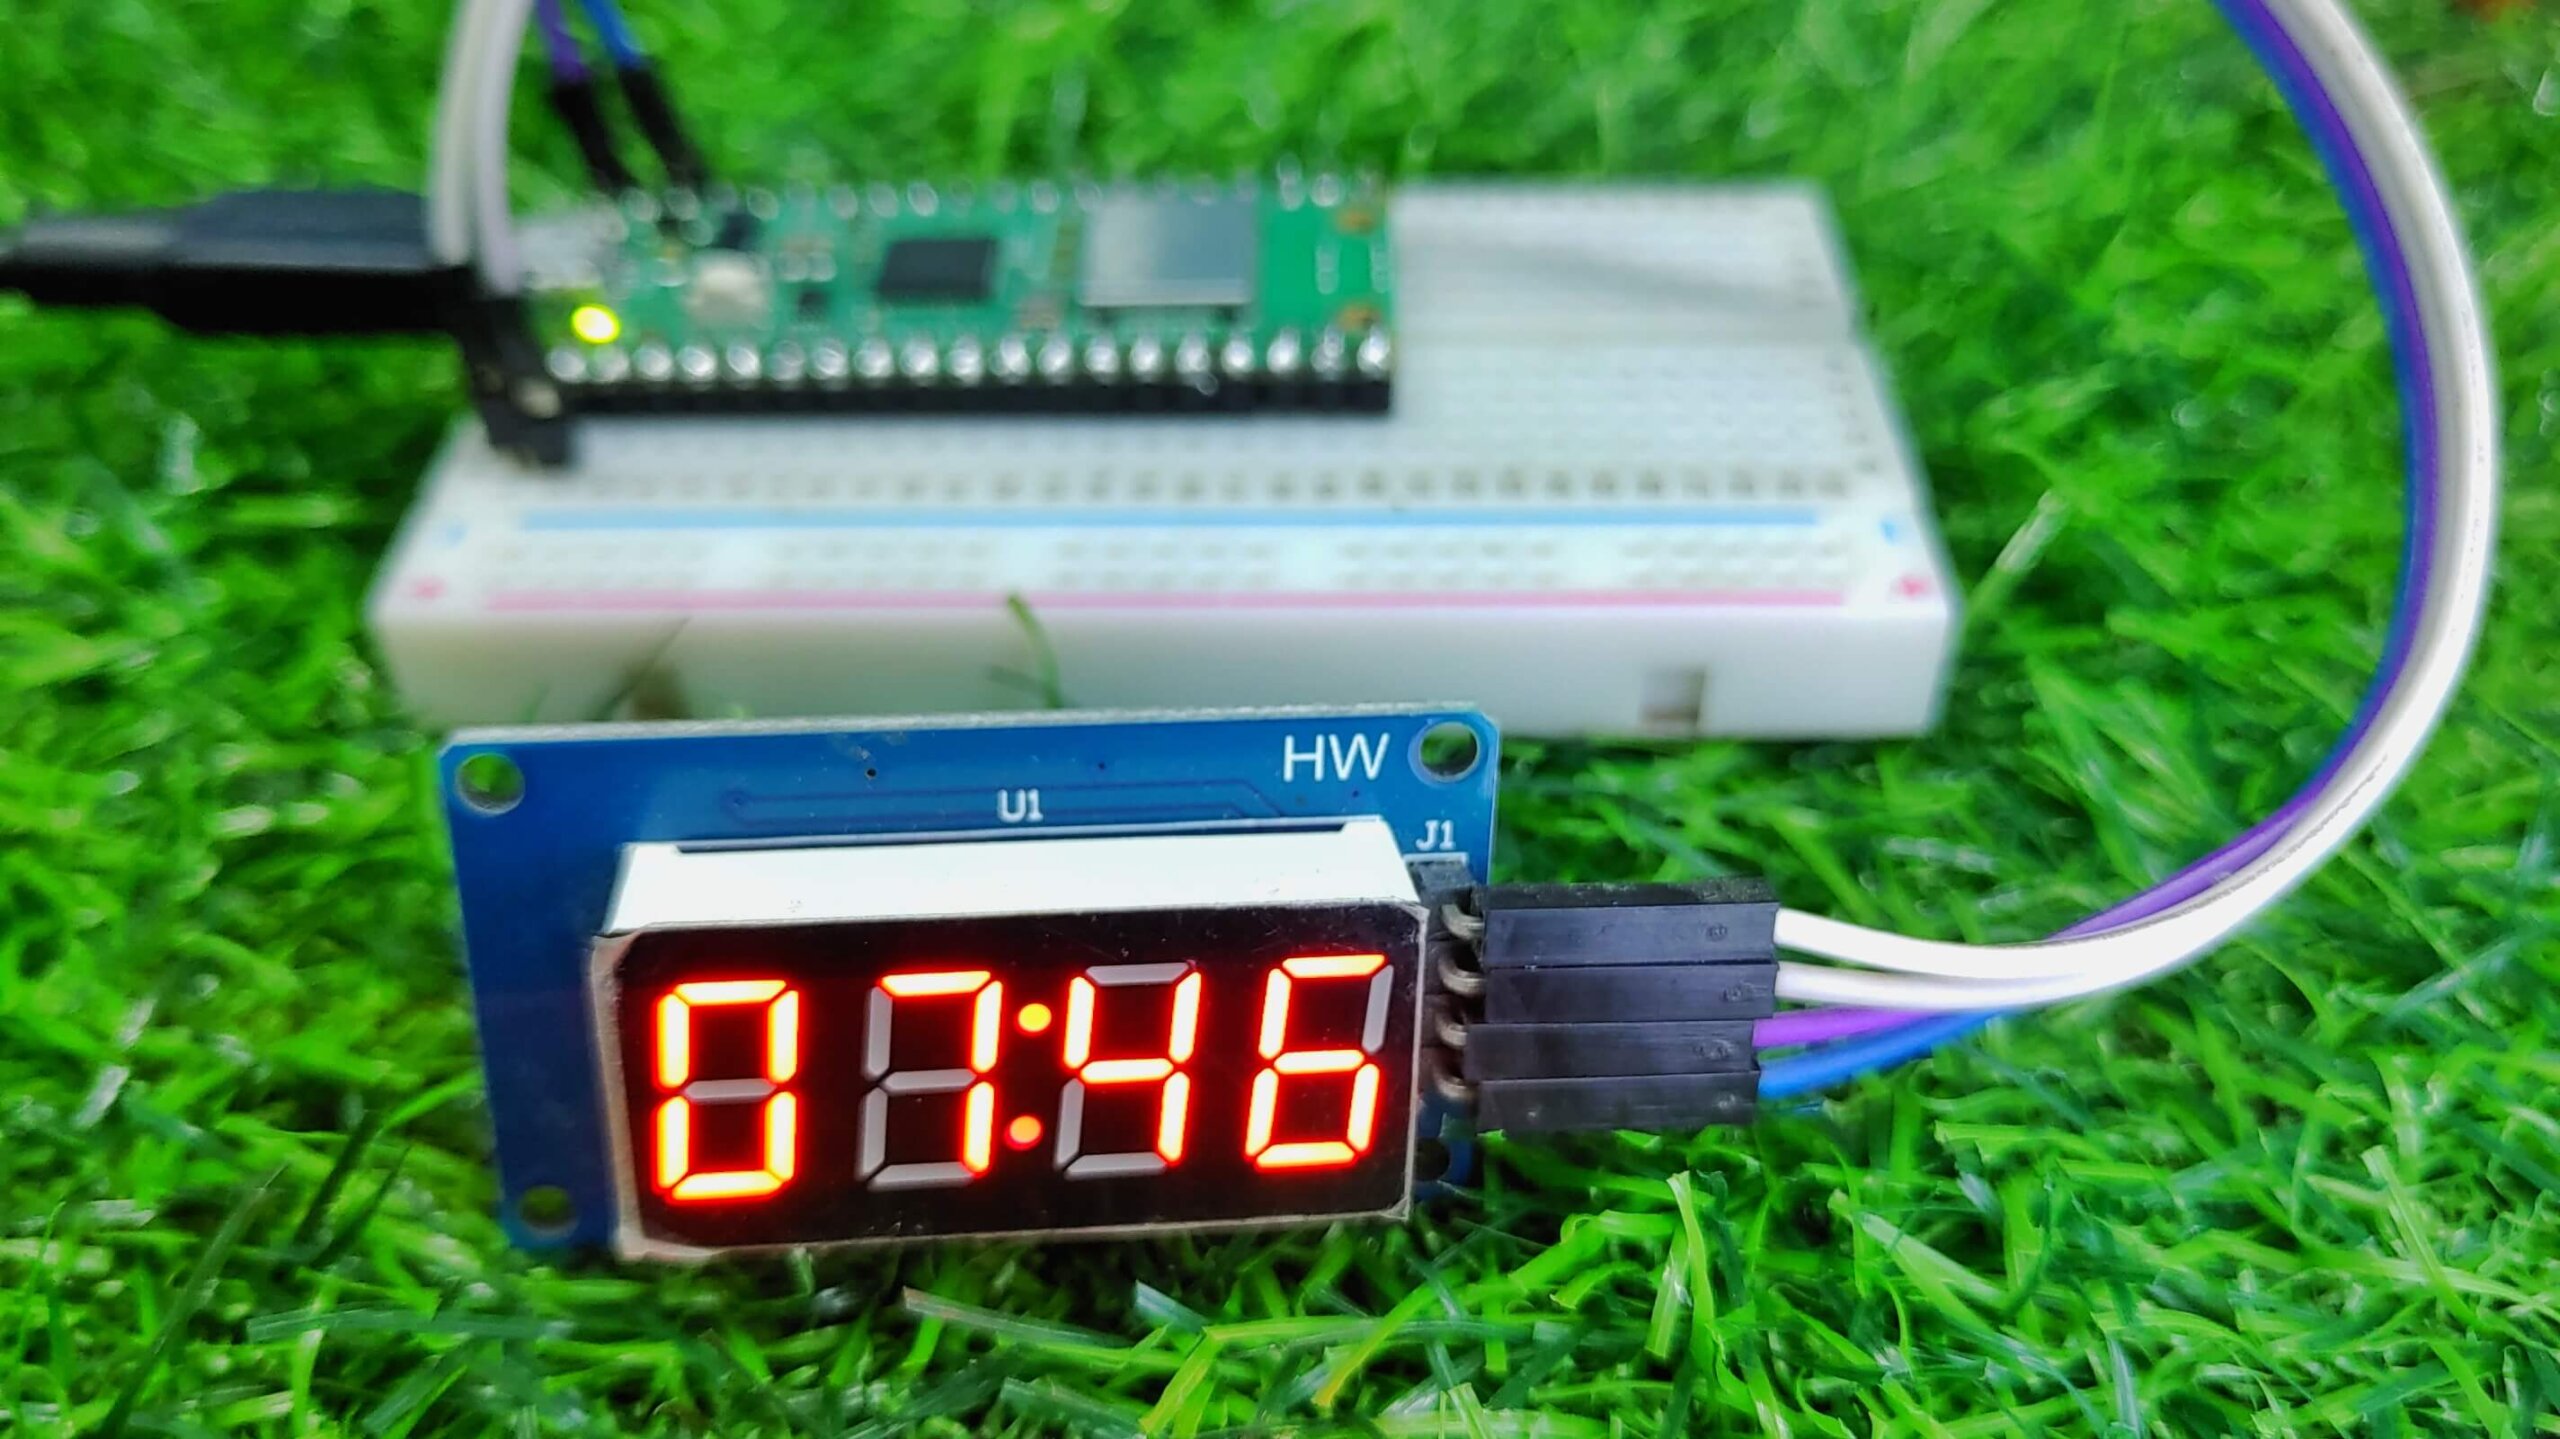
This is a guide on how to use a TM1637 4-Digit 7-Segment LED Display With Raspberry PI Pico using Micropython. We’ll go over how to connect the display, how to control it using Micropython, and finally how to create a simple watch program.
Required materials
You will need the following materials: –
- Raspberry Pi Pico –
- 7-segment LED display –
- Jumper wires –
7-segment LED display
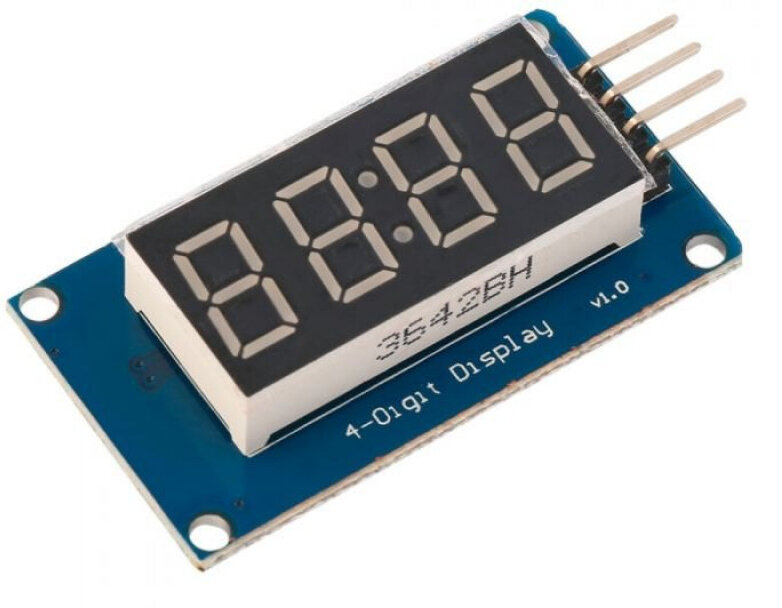
A TM1637 4-Digit 7-segment LED display is a type of electronic display used to show information in numerical form. They are often used in electronic devices such as clocks, calculators, and radios.
The TM1637 display is an excellent method to add numerical information to an electronic project. These displays are easy to use and deliver a clear and straightforward way to display numbers. By following a few easy guidelines, anyone can use a TM1637 display to add numerical information to their project.
The module works between 3.3V to 5V with a current consumption of 80mA. We can interface TM1637 with Raspberry Pi Pico or any different microcontroller operating the two data pins. There is a committed MicroPython Library for TM1637 that removes the complexity and drives it more straightforwardly to communicate with the display.
TM1637 Module Pinout

Pinouts :
- CLK: Clock Input Pin
- DIO: Data Input/Output Pin
- VCC: 3.3V to 5V power supply Pin
- GND: Clock Input Pin
Raspberry Pi Pico
 Raspberry Pi Pico is a low-cost, high-performance microcontroller board with flexible digital interfaces. It is developed for makers, teachers, and anyone interested in creating interactive applications that control physical systems. With its low price, small size, and comfort of use, the Raspberry Pi Pico is perfect for anyone who wants to get started with coding and hardware interfacing. Before we used Raspberry Pi Pico to build many Projects.
Raspberry Pi Pico Pinout

How to Connect TM1637 Module With Raspberry Pi Pico
Connect the ground (GND) pin on the TM1637 module to the ground (GND) pin on the pi pico. Then, connect the power (VCC) pin on the TM1637 module to the power (5V) pin on the Pico. Now, connect the data (DIO) pin on the TM1637 module to the GPIO Pin 1 pin on the Pico. Finally, connect the clock (CLK) pin on the TM1637 module to the 0 pin of the Raspberry Pi Pico respectively.

MicroPython Script
The TM1637 requires a MicroPython library for interfacing with Raspberry Pi Pico. Accordingly, we have codes here as “tm1637.py” & “text.py“.
tm1637.py
|
1 2 3 4 5 6 7 8 9 10 11 12 13 14 15 16 17 18 19 20 21 22 23 24 25 26 27 28 29 30 31 32 33 34 35 36 37 38 39 40 41 42 43 44 45 46 47 48 49 50 51 52 53 54 55 56 57 58 59 60 61 62 63 64 65 66 67 68 69 70 71 72 73 74 75 76 77 78 79 80 81 82 83 84 85 86 87 88 89 90 91 92 93 94 95 96 97 98 99 100 101 102 103 104 105 106 107 108 109 110 111 112 113 114 115 116 117 118 119 120 121 122 123 124 125 126 127 128 129 130 131 132 133 134 135 136 137 138 139 140 141 142 143 144 145 146 147 148 149 150 151 152 153 154 155 156 157 158 159 160 161 162 163 164 165 166 167 168 169 170 171 172 173 174 175 176 177 178 179 180 181 182 183 184 185 186 187 188 189 190 191 192 193 194 195 196 197 198 199 200 201 202 203 204 205 206 207 208 209 210 211 212 213 214 215 216 217 218 219 220 221 222 223 224 |
""" MicroPython TM1637 quad 7-segment LED display driver https://github.com/mcauser/micropython-tm1637 MIT License Copyright (c) 2016 Mike Causer Permission is hereby granted, free of charge, to any person obtaining a copy of this software and associated documentation files (the "Software"), to deal in the Software without restriction, including without limitation the rights to use, copy, modify, merge, publish, distribute, sublicense, and/or sell copies of the Software, and to permit persons to whom the Software is furnished to do so, subject to the following conditions: The above copyright notice and this permission notice shall be included in all copies or substantial portions of the Software. THE SOFTWARE IS PROVIDED "AS IS", WITHOUT WARRANTY OF ANY KIND, EXPRESS OR IMPLIED, INCLUDING BUT NOT LIMITED TO THE WARRANTIES OF MERCHANTABILITY, FITNESS FOR A PARTICULAR PURPOSE AND NONINFRINGEMENT. IN NO EVENT SHALL THE AUTHORS OR COPYRIGHT HOLDERS BE LIABLE FOR ANY CLAIM, DAMAGES OR OTHER LIABILITY, WHETHER IN AN ACTION OF CONTRACT, TORT OR OTHERWISE, ARISING FROM, OUT OF OR IN CONNECTION WITH THE SOFTWARE OR THE USE OR OTHER DEALINGS IN THE SOFTWARE. """ from micropython import const from machine import Pin from time import sleep_us, sleep_ms TM1637_CMD1 = const(64) # 0x40 data command TM1637_CMD2 = const(192) # 0xC0 address command TM1637_CMD3 = const(128) # 0x80 display control command TM1637_DSP_ON = const(8) # 0x08 display on TM1637_DELAY = const(10) # 10us delay between clk/dio pulses TM1637_MSB = const(128) # msb is the decimal point or the colon depending on your display # 0-9, a-z, blank, dash, star _SEGMENTS = bytearray(b'\x3F\x06\x5B\x4F\x66\x6D\x7D\x07\x7F\x6F\x77\x7C\x39\x5E\x79\x71\x3D\x76\x06\x1E\x76\x38\x55\x54\x3F\x73\x67\x50\x6D\x78\x3E\x1C\x2A\x76\x6E\x5B\x00\x40\x63') class TM1637(object): """Library for quad 7-segment LED modules based on the TM1637 LED driver.""" def __init__(self, clk, dio, brightness=7): self.clk = clk self.dio = dio if not 0 <= brightness <= 7: raise ValueError("Brightness out of range") self._brightness = brightness self.clk.init(Pin.OUT, value=0) self.dio.init(Pin.OUT, value=0) sleep_us(TM1637_DELAY) self._write_data_cmd() self._write_dsp_ctrl() def _start(self): self.dio(0) sleep_us(TM1637_DELAY) self.clk(0) sleep_us(TM1637_DELAY) def _stop(self): self.dio(0) sleep_us(TM1637_DELAY) self.clk(1) sleep_us(TM1637_DELAY) self.dio(1) def _write_data_cmd(self): # automatic address increment, normal mode self._start() self._write_byte(TM1637_CMD1) self._stop() def _write_dsp_ctrl(self): # display on, set brightness self._start() self._write_byte(TM1637_CMD3 | TM1637_DSP_ON | self._brightness) self._stop() def _write_byte(self, b): for i in range(8): self.dio((b >> i) & 1) sleep_us(TM1637_DELAY) self.clk(1) sleep_us(TM1637_DELAY) self.clk(0) sleep_us(TM1637_DELAY) self.clk(0) sleep_us(TM1637_DELAY) self.clk(1) sleep_us(TM1637_DELAY) self.clk(0) sleep_us(TM1637_DELAY) def brightness(self, val=None): """Set the display brightness 0-7.""" # brightness 0 = 1/16th pulse width # brightness 7 = 14/16th pulse width if val is None: return self._brightness if not 0 <= val <= 7: raise ValueError("Brightness out of range") self._brightness = val self._write_data_cmd() self._write_dsp_ctrl() def write(self, segments, pos=0): """Display up to 6 segments moving right from a given position. The MSB in the 2nd segment controls the colon between the 2nd and 3rd segments.""" if not 0 <= pos <= 5: raise ValueError("Position out of range") self._write_data_cmd() self._start() self._write_byte(TM1637_CMD2 | pos) for seg in segments: self._write_byte(seg) self._stop() self._write_dsp_ctrl() def encode_digit(self, digit): """Convert a character 0-9, a-f to a segment.""" return _SEGMENTS[digit & 0x0f] def encode_string(self, string): """Convert an up to 4 character length string containing 0-9, a-z, space, dash, star to an array of segments, matching the length of the source string.""" segments = bytearray(len(string)) for i in range(len(string)): segments[i] = self.encode_char(string[i]) return segments def encode_char(self, char): """Convert a character 0-9, a-z, space, dash or star to a segment.""" o = ord(char) if o == 32: return _SEGMENTS[36] # space if o == 42: return _SEGMENTS[38] # star/degrees if o == 45: return _SEGMENTS[37] # dash if o >= 65 and o <= 90: return _SEGMENTS[o-55] # uppercase A-Z if o >= 97 and o <= 122: return _SEGMENTS[o-87] # lowercase a-z if o >= 48 and o <= 57: return _SEGMENTS[o-48] # 0-9 raise ValueError("Character out of range: {:d} '{:s}'".format(o, chr(o))) def hex(self, val): """Display a hex value 0x0000 through 0xffff, right aligned.""" string = '{:04x}'.format(val & 0xffff) self.write(self.encode_string(string)) def number(self, num): """Display a numeric value -999 through 9999, right aligned.""" # limit to range -999 to 9999 num = max(-999, min(num, 9999)) string = '{0: >4d}'.format(num) self.write(self.encode_string(string)) def numbers(self, num1, num2, colon=True): """Display two numeric values -9 through 99, with leading zeros and separated by a colon.""" num1 = max(-9, min(num1, 99)) num2 = max(-9, min(num2, 99)) segments = self.encode_string('{0:0>2d}{1:0>2d}'.format(num1, num2)) if colon: segments[1] |= 0x80 # colon on self.write(segments) def temperature(self, num): if num < -9: self.show('lo') # low elif num > 99: self.show('hi') # high else: string = '{0: >2d}'.format(num) self.write(self.encode_string(string)) self.write([_SEGMENTS[38], _SEGMENTS[12]], 2) # degrees C def show(self, string, colon=False): segments = self.encode_string(string) if len(segments) > 1 and colon: segments[1] |= 128 self.write(segments[:4]) def scroll(self, string, delay=250): segments = string if isinstance(string, list) else self.encode_string(string) data = [0] * 8 data[4:0] = list(segments) for i in range(len(segments) + 5): self.write(data[0+i:4+i]) sleep_ms(delay) class TM1637Decimal(TM1637): """Library for quad 7-segment LED modules based on the TM1637 LED driver. This class is meant to be used with decimal display modules (modules that have a decimal point after each 7-segment LED). """ def encode_string(self, string): """Convert a string to LED segments. Convert an up to 4 character length string containing 0-9, a-z, space, dash, star and '.' to an array of segments, matching the length of the source string.""" segments = bytearray(len(string.replace('.',''))) j = 0 for i in range(len(string)): if string[i] == '.' and j > 0: segments[j-1] |= TM1637_MSB continue segments[j] = self.encode_char(string[i]) j += 1 return segments |
text.py
This Micropython code for scrolling text on Display
|
1 2 3 4 5 6 7 8 9 10 11 12 13 |
import tm1637 from machine import Pin from utime import sleep mydisplay = tm1637.TM1637(clk=Pin(0), dio=Pin(1)) #adjust the brightness mydisplay.brightness(1) sleep(1) # Show a word mydisplay.show("Zeba") sleep(1) #show scrolling text mydisplay.scroll(" PROJECTS LAB ", delay=300) |

time.py
if you want to use your display as Electronic Clock Use this Micropython code for the clock.
|
1 2 3 4 5 6 7 8 9 10 11 12 13 14 15 16 17 18 19 20 21 22 23 24 25 26 27 |
#diyprojectslab.com import tm1637 from machine import Pin from utime import sleep tm = tm1637.TM1637(clk=Pin(0), dio=Pin(1)) Hour = 07 #Set Real Time hour Min = 05 #Set Real Time Minute Sec = 35 #Set Real Time Second if __name__ == '__main__': while True: tm.numbers(Hour,Min,colon=True) sleep(0.5) tm.numbers(Hour,Min,colon=False) sleep(0.5) Sec = Sec + 1 if Sec == 60: Min = Min + 1 Sec = 0 if Min == 60: Hour = Hour + 1 Min = 0 if Hour == 24: Hour = 0 |